Web applications
Tasks studies - laboratory
Project maintained by dawidolko Hosted on GitHub Pages — Theme by dawidolko
Web Applications 1 (AI1) – Lab 5
Laravel Framework – Introduction
Start of the lab:
• Create a folder lab5 on the desktop and open it in VSCode.
Tasks (Laravel):
Task 5.1:
Familiarize yourself with the following topics: • About the Laravel framework,
• Using Laravel to create MVC applications with template views rendered by the Blade engine,
• Using Laravel to create backend parts of the application – backend API
using the data exchange format: JSON,
• Using MVC in the Laravel framework.
(if you reach the limit of articles from this portal, open the link in a private window)
Task 5.2:
Open the terminal cmd (Command Prompt) in VSCode.
Using Composer, create a new Laravel project in the current directory (you can’t omit the dot at the end of the command!). Familiarize yourself with the structure of the directories you created.
Start the php development server for using the artisan’s serve command.
composer create-project laravel/laravel .
php artisan serve
In your web browser, go to: http://localhost:8000
Task 5.3:
Familiarize yourself with routing. Check where the (route) route was set
for the page displayed in the previous task ('/'). Find the file with the view code
responsible for preparing the content of this page.
routes\web.php
resources\views\welcome.blade.php
Task 5.4:
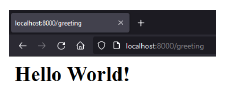
Set the new route so that after going to the path (path) /greeting on the page
the text “Hello world!” is displayed. Then change it so that it is an h1 heading.
Open a second terminal tab cmd (Command Prompt). View all
currently set routes in it. What HTTP method is set for this route?
After making modifications to the application code, there is no need to restart the server.
http://localhost:8000/greeting → Hello world!
php artisan route:list
Task 5.5:
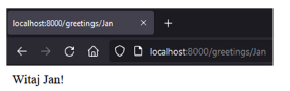
Set the new route so that after going to the path /greetings/{name} [where {name}
acts as a required parameter in the path (path param)] the page displays the following text: „Welcome …!” (name of this person).
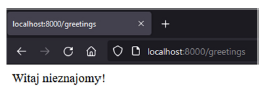
Then change it so that the parameter is optional {name?}, and if the name is not provided, it will default to „stranger”.
http://localhost:8000/greetings/Jan → Hello Jan!
http://localhost:8000/greetings → Hello stranger!
Task 5.6:
Run the following command to create a new controller. Go to the newly created file.
php artisan make:controller TemperatureController
app\Http\Controllers\TemperatureController.php
Task 5.7:
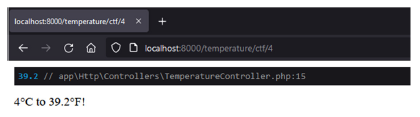
Add a new function called ctf to the controller created in the previous task,
accepting one optional float parameter called c, whose task will be
to convert Celsius to Fahrenheit.
In the case of calling the function: • without a parameter, the message “No value provided” should be returned,
• with a parameter, a message with information such as "4.0°C to 39.2°F" should be returned.
In the web.php file set the route to the temperature/ctf path with the c parameter for this
controller function and at the top of this file add the import to the controller file.
http://localhost:8000/ctf → No value provided
http://localhost:8000/ctf/4.0 → 4.0°C to 39.2°F
[link](https://laravel.com/docs/11.x/controllers#basic-controllers
use App\Http\Controllers\TemperatureController;
Task 5.8:
Familiarize yourself with the debugging helpers: dd() and dump().
Check their operation by using them inside the ctf function from the previous task.
Task 5.9: *
Paste the following fragment into the web.php file and familiarize yourself with the selected elements included in request.
use Illuminate\Http\Request;
//...
Route::get('/task9', function (Request $request) {
$br = "<br>";
$r = $request->path() . $br .
$request->url() . $br .
$request->fullUrl() . $br .
$request->method(). $br .
$request->isMethod('post'). $br .
$request->header('User-Agent'). $br .
$request->ip();
return $r;
});
Task 5.10:
Paste the following fragment into the web.php file.
Understand the parameters (and their values) in a query string
or query params.
Explain the differences between path params and query params. *
use Illuminate\Http\Request;
//...
Route::get('/task10', function (Request $request) {
$br = "<br>";
$r = print_r($request->all(), true) . $br .
$request->query('a') . $br .
$request->query('b', 'no b') . $br .
print_r($request->query(), true) . $br .
$request->a . $br .
$request->has(['a', 'b']) . $br .
$request->filled(['a']) . $br;
return $r;
});
http://localhost:8000/zad9?a=45
http://localhost:8000/zad9?a=45&b=pies
http://localhost:8000/zad9?a=45&b=pies&c=3.5
Tasks (Laravel):
Task 5.11:
Execute the following commands:,
mkdir public\img
mkdir storage\app\public\img
mkdir resources\views\shared
php -r "touch('resources\views\zad13.blade.php');"
php -r "touch('resources\views\index.blade.php');"
php -r "touch('resources\views\shared\head.blade.php');"
php -r "touch('resources\views\shared\navbar.blade.php');"
php -r "touch('resources\views\shared\footer.blade.php');"
Task 5.12:
Paste the following fragment into the web.php file:
Route::get('/task13', function (Request $request) {
$name = $request->name;
$arr = ['a', 'b', 'c', 'd', 'e'];
return view('task13', ['name' => $name, 'arr' => $arr]);
});
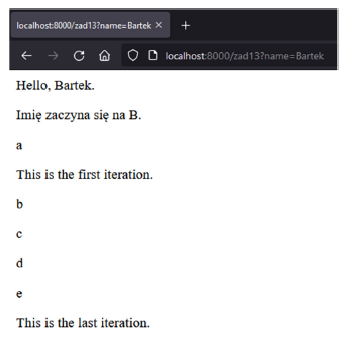
Task 5.13:
In the resources\views\zad13.blade.php template, write code that:
• is a Blade comment, e.g. “This is a comment.” (in the first line),
• if the name variable:
– contains a value, then “Hello, name” (from this variable) is displayed,
– if not, then “No name”,
• if the name variable value starts with “B”, then:
– displays: “Name starts with B”,
– if not, then “Does not start with B”, *
• displays the contents of the arr array, each element in a separate <p>, with the information:
– “This is the first iteration at the first element”, and similar information at the last element;
– in case the arr array does not contain any element, display the appropriate
information. *
Then change the contents of the arr array and provide different names in the name parameter
in the query string.
http://localhost:8000/zad13
http://localhost:8000/zad13?name=Jan
http://localhost:8000/zad13?name=Bartek
Task 5.14:
Download the pliki.zip archive.
Copy the images for the carousel to the public\img folder.
Copy the images for the cards to the storage\app\public\img folder.
Execute the following command.
php artisan storage:link
Task 5.15:
Copy the contents of the lab.html file to index.blade.php.
Set the new route so that after going to the address below, the page
from the index.blade.php template is displayed.
Correct the paths to the images in the cards so that they are loaded from the img folder from storage. link
<img src="">
Task 5.16:
Read about @include.
Separate individual sections of the page into separate templates (in the shared folder),
and then “include” them in index.blade.php (so that the content and layout of the page are as
in previous labs).
@include('shared.…')
Task 5.17:
Supplement the head inclusion with additional information about the title of the current page.
Set the content of the title tag based on this variable.
@include('shared.head', ['pageTitle' => 'Mountain trips'])

<title></title>
Task 5.18: *
Based on the verbal description containing the requirements set for the new database: A database should be constructed that allows storing data on offers of these trips.
The database should store data on countries: name, code (ISO 3166),
currency, total area (in km²), official language. The database should store data on
trips: name, continent where it takes place, duration of the trip
(in days), description of the place where the trip takes place, price of the trip (in zlotys
and groszy), name of the image of the given trip, and country where it takes place.
a) write an SQL script that creates tables (taking into account the connections between them), having ids with auto-incrementing, do not use the wizard in the GUI,
b) create a new trips database in phpMyAdmin and run the previously written SQL script, then generate the ERD diagram,
c) insert the data of trips and countries into the database (based on data from previous labs), so when writing the script, do not use the wizard.
-
- tasks/sub-items to be completed/performed independently,
-
- tasks/sub-items for those interested.
File version: v1.0